How To: Install the New Android 5.0 "Lollipop" Preview Build on Your Nexus 5 or Nexus 7
Update, November 12, 2014: Android 5.0 Lollipop is officially out now. If you haven't gotten the OTA yet, check out our new guide on installing the official Lollipop builds on any Nexus for download links and instructions, for Mac or Windows.Update, October 17, 2014:In advance of the official release of Android 5.0 "Lollipop", Google released a brand new set of preview images for the Nexus 5 and Nexus 7 (2013) this morning. These images are as close as we're gonna get to the final build of Lollipop, and can be easily installed using a Windows PC.The method below will be the same for installing the new preview build, and we've updated the links to reflect any changes. We've also recorded a new video tutorial to make things as easy as possible: Please enable JavaScript to watch this video.
We've also updated the Getting to Know Android 5.0 section towards the end of this article. Enjoy!
Original Instructions:Yesterday's I/O event showcased the upcoming version of Android, whose official release is set for some time this fall. But for curious Nexus 5 and Nexus 7 (2013 Wi-Fi only) owners, a preview version of this new Android build has been made available today.Before you decide if you'd like to install this preview version, consider that all of your data will be lost, and if you're rooted, that will be gone as well. But it's not like you can't just return to stock and then re-root in under a minute, so if you've got all of your data and apps backed up, you should really try this one out. It's got tons of cool new features and a new design that you're sure to love. Please enable JavaScript to watch this video.
Note that, if you don't have a Windows computer handy, there's an equally easy way to install this build using fastboot and your command prompt. Check out Neil's guide for everything you need.
What You'll NeedA Windows PC Good Quality USB Cable with no visible damage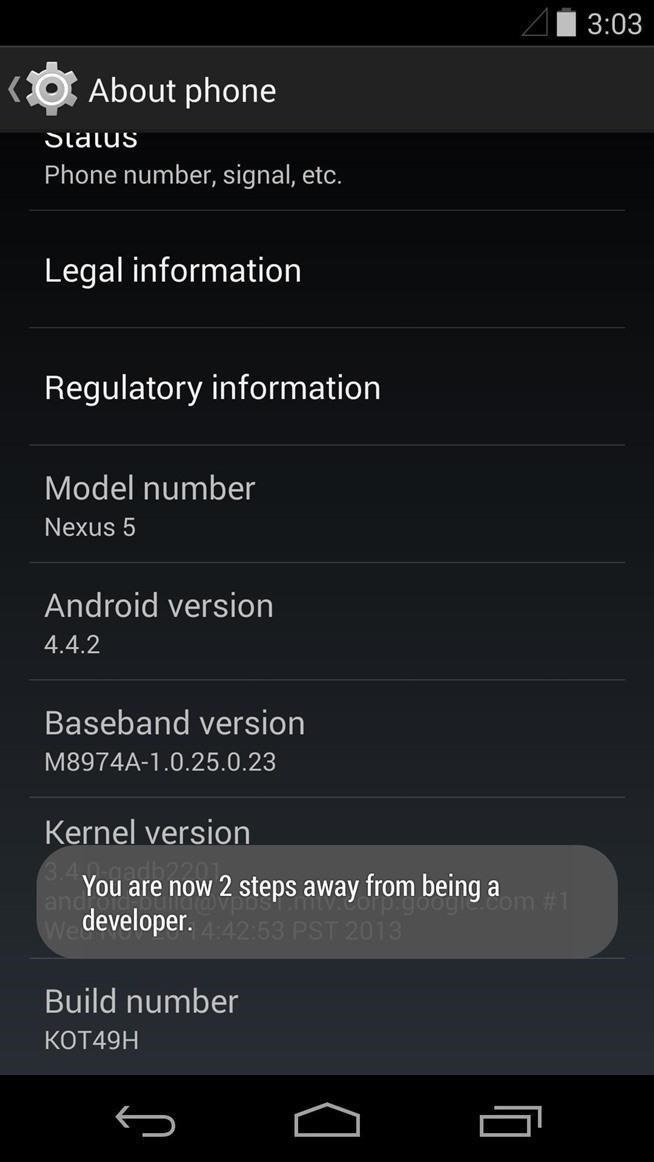
Step 1: Enable USB DebuggingSince this method will utilize Android Debug Bridge, you'll have to enable USB Debugging on your phone, which is in the Developer Options menu. If you don't see that menu in your Settings, let's go ahead and unlock it.Start by going to Settings, then scroll all the way down to the bottom and hit About Phone. From here, scroll down to the bottom again and tap Build Number seven times in a row. Now, just back out one level and you'll see a new Settings menu for Developer Options. Tap this menu, then tick the box next to Enable USB Debugging and press OK on the following pop-up.
Step 2: Connect Your Phone to Your PCThis is a simple, yet important step. Make sure the USB cable that you're using to connect your phone to your PC is in good condition. Check the connection at both ends to ensure a firm fit, and look for any kinks or other damage to the cable itself.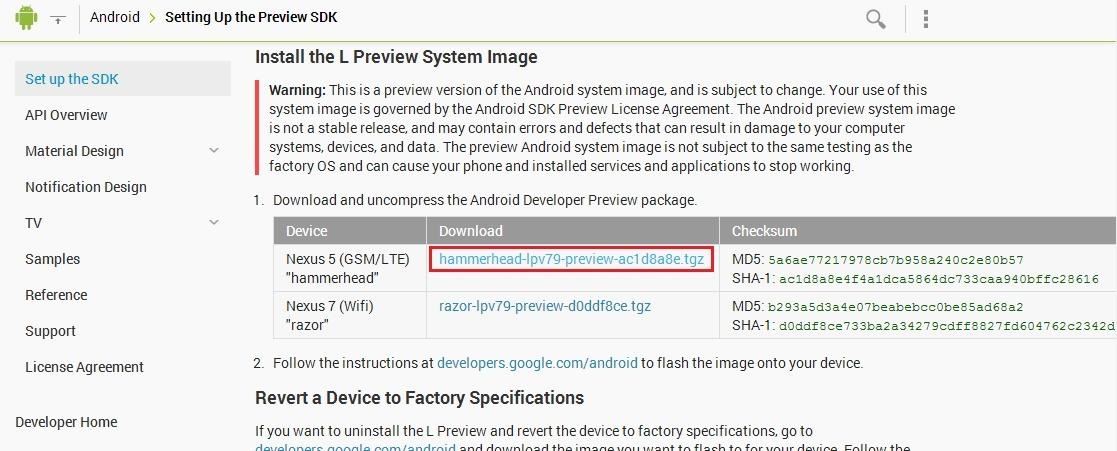
Step 3: Download the Preview Images from GoogleGoogle has made the new Android 5.0 "Lollipop" preview images available on a special developers website, but that doesn't mean the general public can't download them too.From your Windows PC, click this link to head to the download page. From here, scroll down a bit and click the download link next to the Nexus 5 (GSM/LTE) "hammerhead" entry (or Nexus 7 (WiFi) "razor" if you are doing this for your Nexus 7). If you're having trouble with the download link, try middle-clicking it or opening the link in a new tab.This will take you to a Terms of Service page, so scroll down a bit and tick the box next to I have read and agree with the above terms and conditions, then click the download link right below it to get your preview images.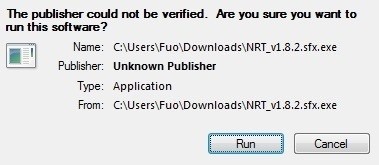
Step 4: Install Nexus Root ToolkitNexus Root Toolkit is a very handy tool that I've used many times in the past. It guides you through some of the harder setup aspects of getting ADB and its drivers installed, then lets you flash factory images at the click of a button.To download WugFresh's Nexus Root Toolkit, click this link from your Windows PC. The download should start automatically, and when it's done, click the file to open it and hit Run. From the next window, just click Install. When the installer is finished, NRT will ask you to enter your device name and Android build number. For Device Name, select Nexus 5, and in the Android Build Number field choose any Android 4.4.4 build (this will be different for Nexus 7 owners—just click the Auto Detect Device + Build... button). At this point, you'll see a dialog box instructing you to enable USB Debugging on your device. You've already covered that part in Step 1, but you'll also need to allow your computer to connect to your device at this point.Unlock your device and you should see a dialog box asking you to Allow USB Debugging. Tick the box next to Always Allow From This Computer and tap OK. Now, NRT will prompt you to download some files. Just click OK on the next two dialog boxes to allow it to download everything it needs.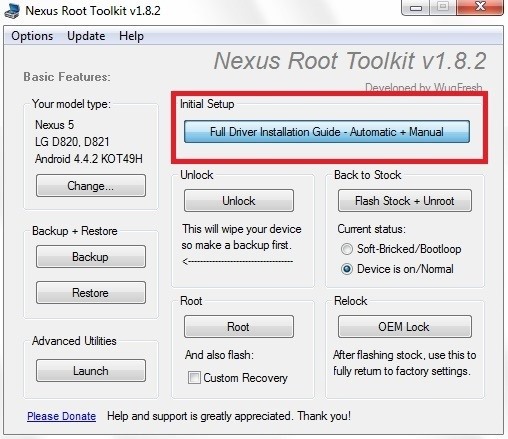
Step 5: Configure Nexus Root ToolkitBy now, you should have arrived at the Nexus Root Toolkit's main screen. But before you get to flashing the images, you'll need to make sure your device drivers are in order. Right up top, click the button that says Full Driver Installation Guide to begin. From the next screen, just skip directly to Step 3. In here, take a look at the Recommended Driver Solution and click the corresponding option below it. This will install all of the appropriate ADB and device drivers, so you know that your device will interact with Windows properly when it comes time to flash the update.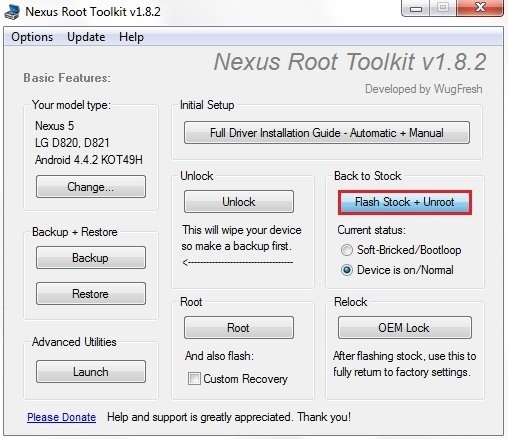
Step 6: Flash the Preview ImagesAt this point, the only thing left to do is install the Android L preview images. From the NRT main screen, click Flash Stock + Unroot to begin. On the following screen, tick the box next to Other/Browse up top, and make sure that I downloaded a factory image myself that I would like to use instead is selected as the second option. A file browser window will pop up at this point. Just navigate to your Downloads folder and select the hammerhead...tgz file that you downloaded earlier (or the razor...tgz file for the Nexus 7). Shortly after that, you'll be asked to enter an MD5 number to verify the file's integrity. Copy the following text, then paste it into the field in that window and click OK:8d92596aa038203fc6c8ff40a0e8b560 (this will be different for the Nexus 7) At this point, the file will be verified and extracted, so give it a minute or two. When it's done, a window will appear that summarizes the install options you've selected. Click OK here to begin flashing the update, making sure that your phone doesn't get disconnected from your PC during this process. The process takes at least 5 minutes to complete, so don't freak out if it seems to get hung up on one aspect of the install. When it's finished, you'll get a confirmation dialog that instructs you to Press any key to exit, so do that. Close out any further dialog boxes, as you're done with the Nexus Root Toolkit. At this point, it's safe to disconnect your USB cable, and give your phone at least 5 minutes to finish booting.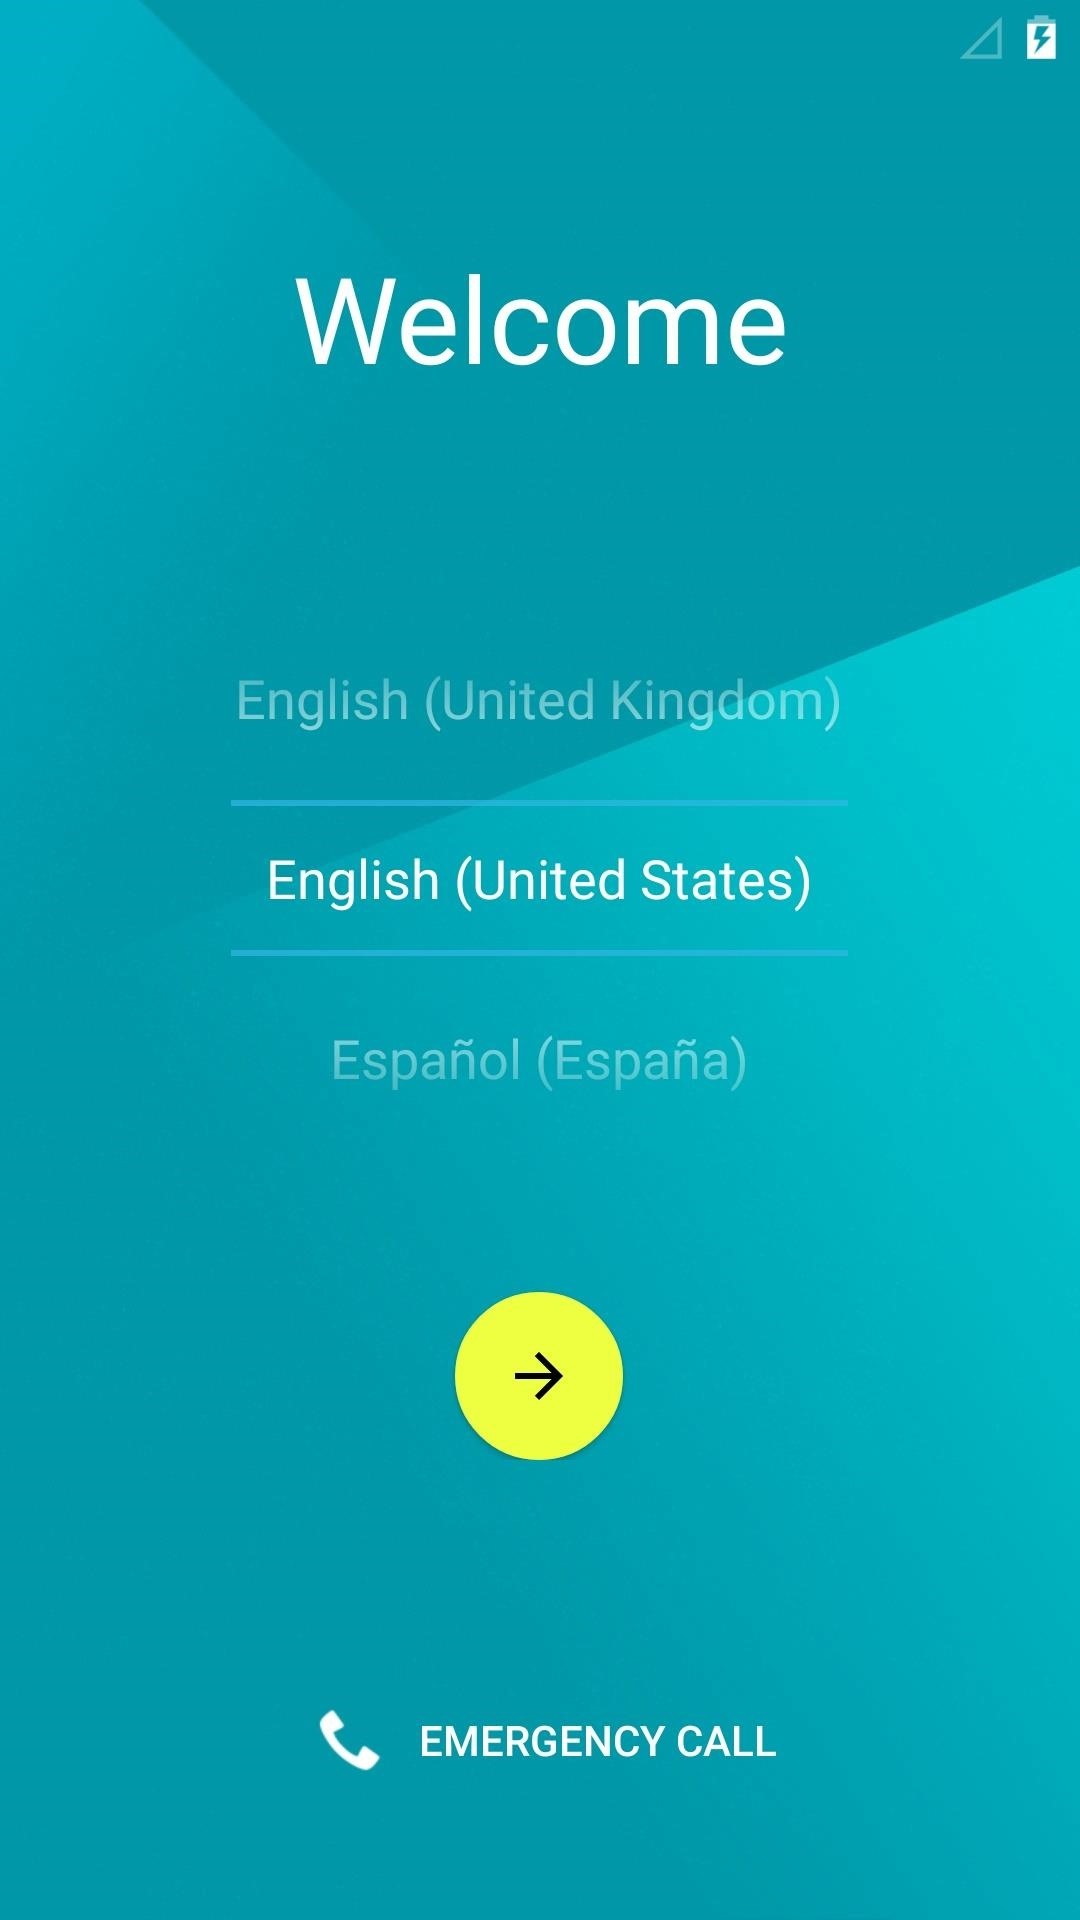
Getting to Know Android 5.0This new preview build has been greatly refined since Google's first Android 5.0 release in June. The updates are noticeable right off the jump—the initial setup guide has been polished, and there's even a new Tap and go feature that uses NFC to transfer settings and data from your old device. The home screen has a new overview menu, and the app drawer now has a white background that animates out when you press the app drawer button. The integrated Google Now home screen page now has a slide-out navigation drawer. This gives quick access to settings and other customization options. The phone app was updated in the original "L" preview, but has received a minor facelift this go-around as well. With a new color scheme and an updated Floating Action Button, it's looking just about ready for prime time. The default keyboard, which received a Material Design makeover in June's release, now has a white theme, which is enabled by default. It's a big release for Android, and I'm absolutely loving it. What are your thoughts on the new UI elements? Let us know in the comments section below.
13 tips and tricks to master your HTC One (M8) 11 simple tips and tricks to get more from your LG G3 How to change your Android keyboard You may have never thought to change the keyboard
5 Ways to Break Into Your Locked Android Device - wikiHow
News: All the Cool Kids Are Going to Instagram, Hanging Snapchat Out to Dry News: World of Warcraft Lens on Snapchat Lets You Transform into Orc or Elf & Do Battle in Augmented Reality News: If You Use Snapchat, Don't Jailbreak Your iPhone
Snapchat Lost Your Trust? Here's How to Completely Delete
Game Tuner is a Samsung-created app that helps performance across all Galaxy devices — including the Galaxy S9. Even though it's called Game Tuner, it can increase performance for any app installed on your phone, but it also has the ability to save battery life and generate heat — when used correctly. Step 1: Download & Install Game Tuner
How to Speed up Galaxy S3 for Maximum Performance [2018]
Check out this video tutorial on how to take apart the HP iPAQ hw6515 Mobile Messenger cell phone to remove the screen for replacement or other minor repairs. See how to completely disassemble the cellular phone for all of those down and dirty fixes you need to repair.
How to Repair an HP iPAQ H4150 or H4155 PDA - help for cell
How to Uninstall and reinstall Cydia if it crashes
Editor's Choice: 11 Camera Apps to - Samsung Galaxy Note 2
Google has a lesser-known Android app called Device Assist that might just be one of the most useful programs the company has ever published. It offers interactive guides and general tech support for Android, plus it can diagnose your device and help you fix any issues it finds.
How to Keep Your PC Running Fast and Smooth - wikiHow
Sony has just made the Xperia XZ2 Premium official. The device is built around a 5.8-inch 4K HDR display, which is 11% larger and 30% brighter than the 4K HDR display on the XZ Premium. The front and back of the device are protected by a Corning Gorilla Glass 5 and it has IP65/68 ratings for dust and water resistance.
Sony unveils the Xperia XZ2 Premium new screen 4K HDR camera
This article shows you 7 ways to control your Android from a PC. You'll be able to share your mouse and keyboard, mirror the screen, send files and answer WhatsApp messages - all without getting
By just using Google Translate, everyone's favorite online translator for text and foreign websites, you can actually recreate a pretty spectacular beatbox with a few nifty "word" creations. Making Google Translate Beatbox for You. Just open up Google Translate and copy/paste the text below.
How to Make Google Translate Beatbox | The Mary Sue
If you don't want calls or messages for your iPhone on your iPad, iPod touch, or Mac, you can remove your phone number. There are two ways to do this: On your iPhone, go to Settings > Messages > Send & Receive. Select your Apple ID and tap Sign Out. Then go to Settings > FaceTime, select your Apple ID and tap Sign Out.
Tip: how to add a new email to your iMessage account in iOS
Politics Military & Defense News The Revolution of the Hacked Kinect, Part 1: Teaching Robots & the Blind to See. WonderHowTo. Part 1: Teaching Robots & the Blind to See on WonderHowTo.
Teaching Robots And The Blind To See - Business Insider
3 New Ways to Save Snapchats Without Getting Caught on
Public beta testers, you're in luck. Apple just released the second iOS 12.4 public beta today, May 20. The update comes five days after the release of the first developer beta for iOS 12.4 and seven days after the release of iOS 12.3. Public beta 2 and dev beta 2 were both released at the same time
Apple Releases iOS 12.4 Public Beta 3 Today for Software
How to Increase your Swype speed and text faster than ever
0 comments:
Post a Comment