How To: Replace Video Backgrounds with the Green Screen Chroma Key Tool in Enlight Videoleap for iPhone
Using a green screen is an affordable and easy way to transport your video to anywhere imaginable, even to places that don't exist. You can use it to sit behind a desk in a busy newsroom or dance on the moon, but first, you have to know how to properly perform chroma key compositing two videos together. Fortunately, Enlight Videoleap on iOS makes it easy.Chroma keying is when you combine two images or videos together, compositing them together based on color hues. The top layer will have portions that are "green screened" (or that use a different flat color). Those portions, whether the entire background or just a small spot covering a TV screen, will be replaced by what's in the bottom video layer. This allows filmmakers to transport subjects into completely different worlds, "air" specific video content on screens, and more.You no longer need powerful desktop editing software to combine green screen footage with your background footage — your iPhone is more than adequate to get the job done. And Videoleap's chrome key feature can help you blend together two images or videos in seconds. You can use your own green screen and background footage or you can play around Videoleap's stock footage to test it out.
Step 1: Add Green Screen + Background VideoFirst, before going any further, make sure you've updated "Enleap Videoleap Video Editor" on your iPhone. Then, open it up, and start by finding both a green screen video and a video that you want to play in the background.We're going to show you three different methods on how to add the two videos together in your Videoleap project. For Method 1, we'll add the background video first, then the green screen video, while in Method 2, we'll add the green screen video first, then the background video. In Method 3, we'll add them both separately then combine them after.All these methods work, but the second and third ones will automatically format the background video to the size of the green screen video (if the same aspect ratio), which is useful if you don't want to change the size of it.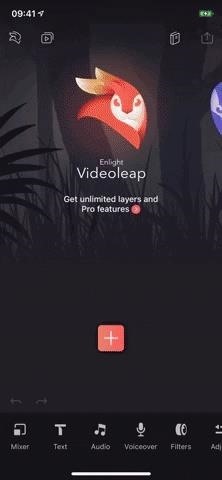
Method 1: Adding Background, Then Green Screen VideoIn the timeline, tap on the red-and-white plus sign, and find a video that you want to be in the background of your green screen video, meaning it appears in place of the green screen. You can search through your "Camera Roll" or any of the albums in your Photos app, in your Files app, or via stock footage provided by Videoleap and others (some is not free).After you add a video to the timeline, tap on "Mixer" in the bottom left, in the toolbar. Now, either upload a green screen video from your albums or find a free green screen video from the stock section. After you tap on it, the green screen video will be placed over the video already in your project, starting at wherever the playhead is at.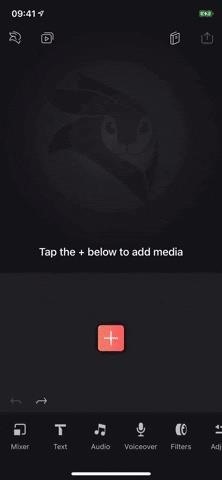
Method 2: Adding Green Screen Video, Then BackgroundThis is similar to Method 1, but after you tap the red-and-white plus sign in the timeline, you select a green screen video first. After that, tap on the green screen clip in the timeline to highlight it, then scroll through the toolbar at the bottom, and tap on "Mixer." Your green screen clip will shrink up to the top layer in the timeline.Next, tap on the red-and-white plus sign button that appears underneath the green screen layer, then find and select the background video you want. No matter where the playhead was placed, the background will appear in the timeline starting at the same time as the green screen clip.
Method 3: Adding Background & Green Screen Video SeparatelyThe third way is pretty simple. Just tap the red-and-white plus sign in the timeline, then select either your green screen video or your background video. Once it's in the timeline, tap the red-and-white plus sign again to add the other video.Once they are both in the timeline on the same layer, tap-and-hold on the green screen clip in the timeline until the clip becomes a little box, then drag it upward a tiny bit until it opens up the top layer and the square becomes an upside-down teardrop, then drag it over top the video you want to composite it with and let go.
Step 2: Replace the Green with the Background VideoNow that your two videos layered in the timeline, make sure the top green screen layer is highlighted (if you used Method 1 or Method 3 above, it will already be highlighted), then tap on "Chroma" in the toolbar.The color "Picker" tool will be selected, and you need to tap-and-hold on the circle icon in the video, then move it until the crosshairs are in the green screen area. The green screen area will instantly disappear, replaced with the background video.You have two tools to edit the composite: "Threshold" and "Spread." Use "Threshold," which is set to 25 by default, to refine the edges of the object(s) from the green screen video; Increase it to make the objects more refined. Use "Spread," which is 0 by default, to configure the opacity of the on-screen objects; If you increase it too much, the green area will start to show up. If you're not happy with the green screen results, you can use "Reset" to start over.Once you're set, tap on the grey area in the timeline or the back button in the toolbar to exit the chroma keying tool. Then, you can tap on the green screen video clip to edit the size and placement of the foreground, if needed. Once the red lines appear around the video, pinch in to make it smaller or pinch out to enlarge it, and drag and drop it to where you need it. If you don't need to make any other adjustments (see Step 3), tap on the Action (aka Share) icon in the top right, then the "Save" button to download it to your device. You can adjust the resolution and frames per second before doing so. Below is the end result of the two videos blended together above.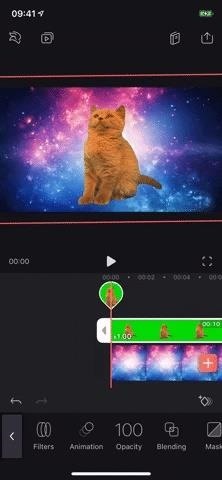
Step 3: Adjust the Layers in the TimelineIf you're satisfied with how your green screen clip looks, it's time to make further adjustments, if needed. To move it to a later part of the background video, simply tap-and-hold the middle of the green screen layer in the timeline, then drag it to the position you want.To shorten the green screen clip, tap-and-hold either end of the layer, then slide inward to where you want. And to delete either the green screen or background layer, tap-and-hold on it, then slide it down onto the trash can icon that appears. If you want to adjust brightness, contrast, saturation, exposure, and other aspects of either the green screen layer or background layer over time, use the "Keyframe" tool (the diamond icon with a plus sign that appears above the toolbar on the right) to create animations in specific sections of the video. You can use it to add fade ins and fade outs, too, but there are dedicated tools for that in the "Animation" section.This article was produced during Gadget Hacks' special coverage on smartphone-based video creator tips for filming and editing. Check out the whole Videography series.Learn How: How to Use Keyframes to Animate Effects & Create Custom Transitions in Enlight Videoleap for iPhoneFollow Gadget Hacks on Pinterest, Reddit, Twitter, YouTube, and Flipboard Sign up for Gadget Hacks' daily newsletter or weekly Android and iOS updates Follow WonderHowTo on Facebook, Twitter, Pinterest, and Flipboard
Cover photo, screenshots, and GIFs by Nelson Aguilar/Gadget Hacks
One of the most anticipated features on the iPhone 3G was the inclusion of GPS technology. Apple's incorporation of GPS (Global Positioning System) onto its portable mobile phone enables users to receive directions and navigate anywhere they are in the world.
How to enable and use Maps extensions on iPhone and iPad
How To: All Side Button Tips & Tricks You Should Be Using on Your iPhone X S, X S Max, or X R; How To: Make the Volume Buttons Control Ringtones & Notifications Again in Android Pie How To: Use Your Android's Volume Keys to Move the Cursor in Any Text Field—No Root Needed
How To: Send Your Uber Trip Status to Trusted Contacts if You're Ever in a Sketchy Situation News: Uber in More Hot Water with Pittsburgh Officials as Driverless Deal Sours News: How to Become Body Confident and Gain Self Respect How To: Decode Body Language
How To: Stop Uber from Tracking Your Location in the
There are some free online GIF makers out there. They're not great, but if you you're looking for something super quick and with no bells or whistles, they'll get the job done. Giphy: This is the best place to find GIFs, and it has an easy GIF maker tool. GifMaker: You can drop a YouTube link into here to make from a video.
17 of the Best Free Online GIF Creators (Great Way to Make a
How to Enable Dark Mode on iPhone via Control Center. To use Dark Mode on your iPhone in iOS 13, open up the Control Center. Next, long-press the display brightness control, and you'll see a new "Appearance Light" button. Tap that to enable Dark Mode, which will turn the button into "Appearance Dark."
Enable Grayscale Mode on Your iPhone, iPad, or iPod - YouTube
Hi, I've been here for a while and developed a lot of skills. Today I started playing with WiFi karma attack. Of course I know how to start honeypot with particular SSID and MITM connection, inject iframes, detect that (self defence), prevent (be careful and VPN in most cases is enough), but there is one thing, I cannot stop thinking about.
Python Script for talking with Your Jarvis.. - WonderHowTo
All the Cool Kids Are Going to Instagram, Hanging Snapchat
How to free up storage space on your iPhone The trick everyone's talking about. You Message history can take up lots of space, particularly if you and your friends like to share masses
This trick can free up space on your iPhone - USA TODAY
Plenty of experts argue that anyone who wants to develop a skill, play an instrument, or lead their field should start early, focus intensely, and rack up as many hours of deliberate practice as possible. If you dabble or delay, you'll never catch up to the people who got a head start.
10 Hidden Apple TV Features You Should Know Chris Hauk - Sep 23, 2018 If you're an Apple TV user, you already know it's one of the best ways around to enjoy streaming content, be it from Apple's own iTunes library, streaming TV apps, or more.
10 hidden Hyper-V features you should know about! - Thomas Maurer
How to use Snapchat on Mac - Macworld UK
If you're having a little trouble operating your newly purchased Samsung Instinct cell phone, let Sprint help you out. This Sprint video mobile phone tutorial takes you through every step necessary to fully familiarize yourself with the Instinct cell phone by Samsung. This instructional tour will
Samsung Instinct Cell Phone: How to use it as a modem
0 comments:
Post a Comment